Your Complete Guide to Setting Up a Marble Fountain
Table of Contents
Have you ever dreamed of transforming your outdoor space into a serene oasis? A marble fountain can do just that. Its timeless beauty adds elegance to any garden or courtyard, while the soothing sound of flowing water creates a peaceful retreat. Did you know marble is the second-largest material segment in the U.S. water fountain market, valued at $124.59 million in 2023? With its popularity growing at a steady 3.48% annually, it’s clear that more people are embracing this classic centerpiece. Installing one might seem daunting, but trust me, with the right guidance, it’s absolutely achievable.
Key Takeaways
Pick a good spot for your marble fountain. Make sure it’s easy to see and away from dirt or busy areas.
Make the ground flat and steady before setting it up. Use a level tool to check and fix uneven spots.
Get all the tools and supplies you need first. You’ll need a level tool, shovel, concrete mix, and sealant for smooth setup.
Plan where water and power will come from. Check local rules to avoid problems later.
Follow the maker’s instructions when putting it together. Take your time to make sure each part is secure and works well.
Make your fountain look nicer by adding plants or mulch around it. This helps it blend into your garden.
Clean your fountain often to stop dirt and algae. Keeping the pump and tubes clean helps water flow better and last longer.
In winter, drain the water and cover the fountain. This stops freezing damage and keeps it ready for spring.
Pre-Installation Preparations
Selecting the Perfect Location
Key factors for site selection
Choosing the right spot for your marble fountain is the first step to success. I always recommend picking a location that’s both practical and visually appealing. Think about where you spend the most time outdoors. Is it your garden, patio, or courtyard? Placing the fountain where it’s easily visible and accessible makes a big difference.
Also, consider the surroundings. Avoid areas with overhanging trees or heavy foot traffic. Falling leaves and debris can clog the fountain, and you don’t want it to become a tripping hazard. Lastly, check how the sunlight hits the area. Too much direct sunlight can cause algae growth, while too much shade might make the space feel damp.
Ensuring a stable and level surface
A stable, level surface is non-negotiable for a marble fountain. Uneven ground can lead to tilting or even cracks over time. I suggest using a spirit level to check the ground. If it’s not flat, you’ll need to level it out. You can add soil or sand to low spots and compact it firmly. Trust me, taking the time to do this now will save you headaches later.
Tools and Materials Checklist
Essential tools for installation
Before you start, gather all the tools you’ll need. Here’s a quick list of must-haves:
Spirit level: To ensure everything is perfectly balanced.
Shovel: For clearing the site and digging the foundation.
Rubber mallet: To gently secure fountain parts without damaging them.
Measuring tape: For accurate measurements.
Wrench set: To tighten bolts and fittings.
Bucket: Handy for mixing concrete or carrying water.
Having these tools ready will make the process smoother and more efficient.
Materials required for the project
Now, let’s talk about materials. You’ll need:
Gravel: For drainage and stability.
Concrete mix: To create a solid base.
Sealant: To waterproof the fountain and protect it from moisture damage.
Tubing and pump: For the water system.
Electrical wiring: If your fountain includes lighting or a powered pump.
Double-check that you have everything before you begin. Running to the store mid-project isn’t fun!
Planning Plumbing and Electrical Needs
Identifying water and power sources
Your fountain needs water and power to function, so plan these connections carefully. I like to start by identifying the nearest water source. If you’re using a garden hose, make sure it can reach the fountain. For a more permanent setup, you might need to install a dedicated water line.
For power, look for an outdoor electrical outlet. If you don’t have one nearby, you’ll need to install one. Make sure it’s a GFCI (Ground Fault Circuit Interrupter) outlet for safety.
Ensuring compliance with local regulations
Before you dig or install anything, check your local regulations. Some areas have rules about water usage, electrical installations, or even fountain placement. Contact your local building department or HOA to avoid any surprises. Trust me, it’s better to be safe than sorry.
Tip: Keep a copy of your fountain’s manual handy. It often includes specific guidelines for plumbing and electrical setup.
Foundation Preparation
Clearing and Leveling the Site
Removing debris and vegetation
Before anything else, I always start by clearing the site. It’s important to remove any debris, rocks, or vegetation from the area where the marble fountain will sit. Trust me, skipping this step can lead to uneven surfaces or even damage to the fountain later. I like to use a sturdy shovel and a rake for this task. If there are stubborn roots or weeds, a garden hoe works wonders. Once the area is clear, you’ll have a clean slate to work with.
Tip: Bag up the debris and dispose of it properly. This keeps your workspace tidy and prevents any tripping hazards.
Preparing a flat surface
Once the site is clear, it’s time to level the ground. Uneven surfaces can cause the fountain to tilt, which might lead to cracks or water flow issues. I usually spread a layer of sand or soil over the area and use a long wooden board to smooth it out. A spirit level is your best friend here. Check the surface from multiple angles to make sure it’s perfectly flat. This step might take a little time, but it’s worth it for a stable foundation.
Excavating for the Fountain Base
Determining the appropriate depth
Now comes the digging. The depth of the excavation depends on the size and weight of your marble fountain. For most fountains, I recommend digging about 6-8 inches deep. If your fountain is particularly large, you might need to go deeper. Use a measuring tape to ensure consistency across the entire area. A uniform depth is crucial for stability.
Note: Always call your local utility company before digging to avoid hitting underground pipes or cables.
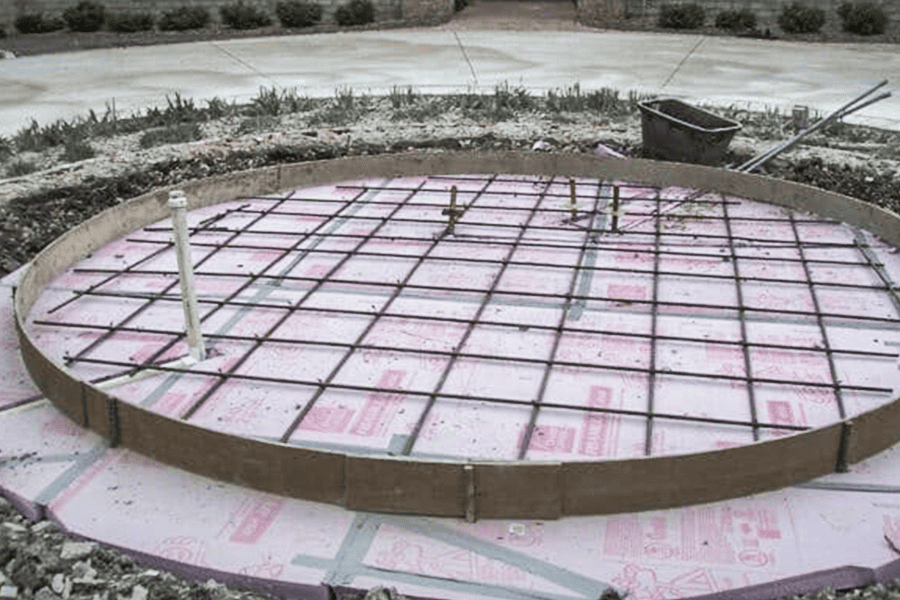
Adding a gravel layer for drainage
After digging, I like to add a layer of gravel to the base. This helps with drainage and prevents water from pooling under the fountain. Spread about 2-3 inches of gravel evenly across the bottom of the hole. Use a tamper to compact the gravel firmly. This creates a solid, well-drained surface that supports the fountain and protects it from water damage.
Setting Up a Solid Base
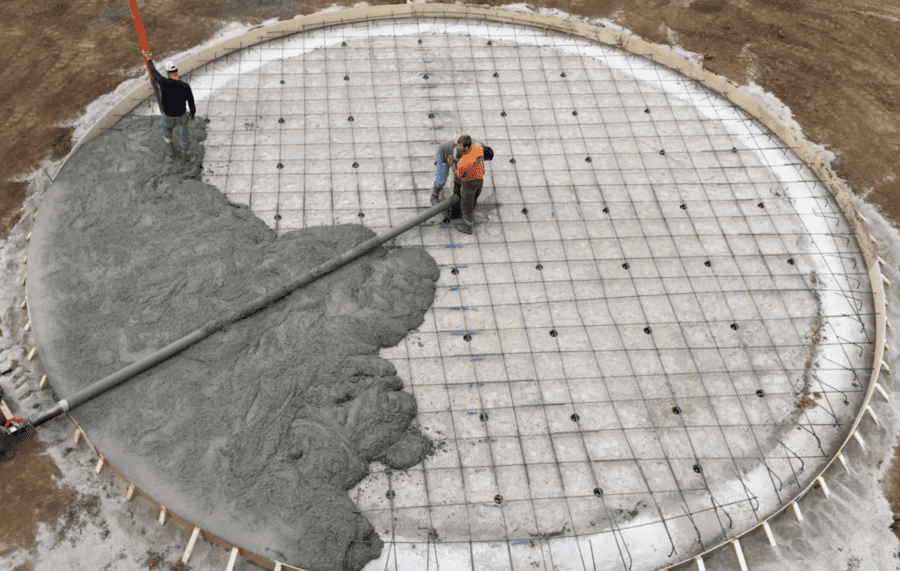
Pouring and leveling concrete
With the site prepped, it’s time to pour the concrete. I mix the concrete according to the instructions on the bag, aiming for a consistency that’s not too runny. Pour the mixture into the excavated area, spreading it evenly with a trowel. Use your spirit level again to ensure the surface is perfectly flat. A level base is critical for the long-term stability of your marble fountain.
Here’s a quick reference for curing times based on the type of cement you use:
Cement Type
Typical Curing Time
Standard Portland
7 days
High Early-Strength
3-5 days
Sulfate-Resistant
10-14 days
White Cement
7 days
Slag Cement
14-28 days
Pro Tip: If you’re in a hurry, High Early-Strength cement cures faster, but for most projects, Standard Portland cement works just fine.
Allowing the base to cure
Once the concrete is poured and leveled, patience is key. Let the base cure completely before moving on to the next steps. For most cement types, this takes about 7 days. During this time, avoid placing any weight on the base. Concrete gains about 65-90% of its strength within the first week, so rushing this step could compromise the foundation.
Concrete Age
% of 28-day Strength
3 days
20-40%
7 days
65-90%
14 days
90-100%
28 days
100%
By the end of the curing period, you’ll have a rock-solid base ready to support your marble fountain for years to come.
Marble Fountain Assembly
Inspecting and Organizing Components
Checking for damage or missing parts
Before diving into the assembly, I always take a moment to inspect all the components. Trust me, this step saves a lot of frustration later. Look for cracks, chips, or other damage on the marble pieces. If you spot anything, contact the manufacturer right away. Missing parts can also derail your progress, so double-check the inventory list in the manual. It’s better to address these issues now than halfway through the installation.
Tip: Keep the packaging handy until the fountain is fully assembled. It’s perfect for safely storing smaller parts and tools during the process.
Arranging components for easy access
Once I’ve confirmed everything is in good shape, I like to organize the components. Lay them out near the installation site in the order you’ll need them. For example, place the base pieces closest to you, followed by the middle sections, and finally the decorative top. This simple step makes the assembly process much smoother. Plus, it reduces the risk of accidentally damaging parts while searching for them.
Step-by-Step Assembly
Following the manufacturer’s instructions
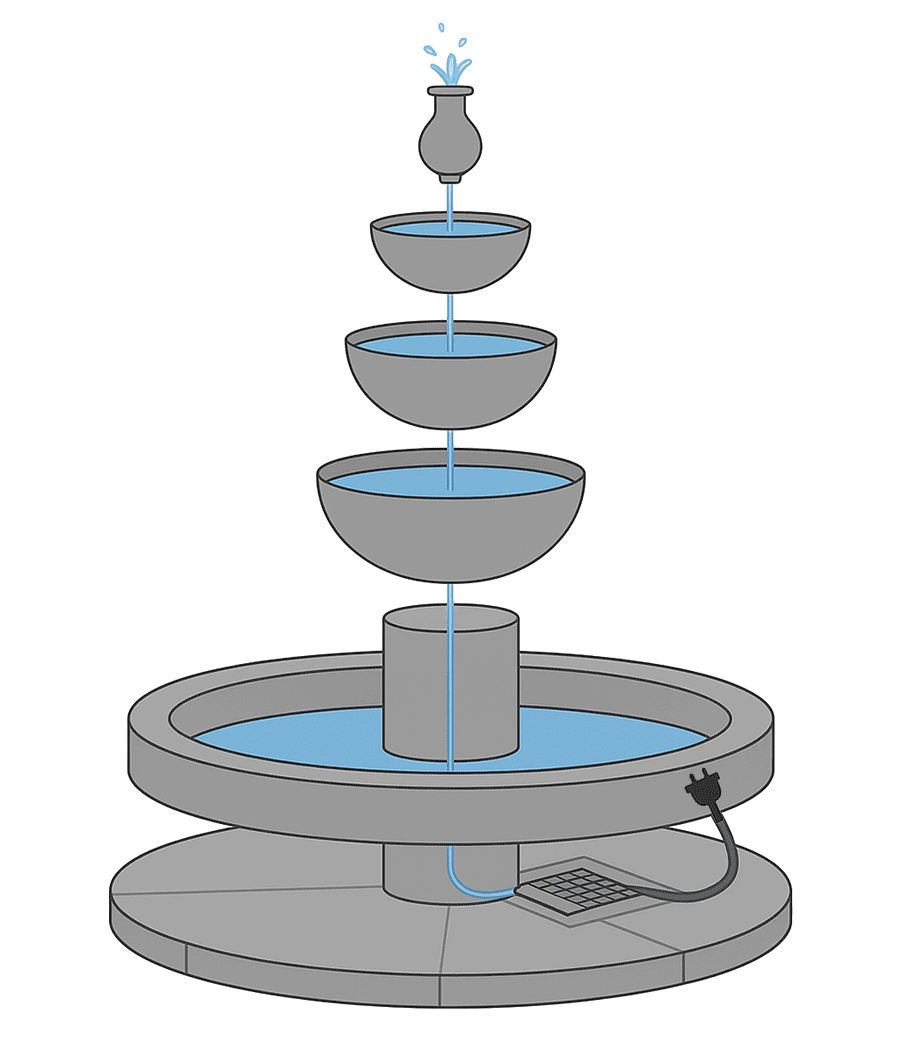
When it comes to assembling a marble fountain, the manufacturer’s instructions are your best friend. Every fountain is unique, so don’t skip this step. Here’s a general guide I follow to keep things on track:
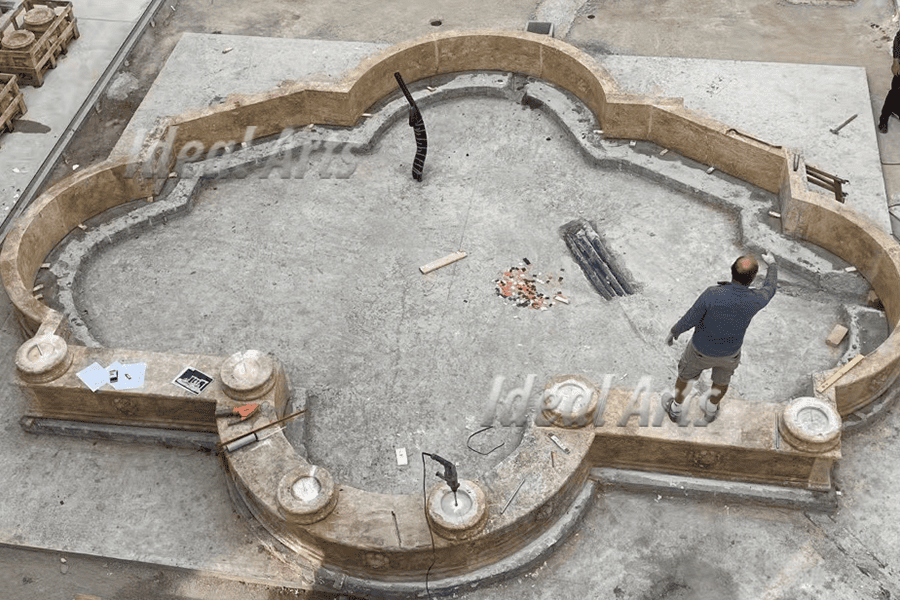
Install the Base Plate: Start by placing the base plate on the cured concrete foundation. Make sure it’s perfectly level.
Install the Pool: If your fountain includes a pool, position it around the base plate. Secure it firmly to prevent leaks.
Install the Fountain Core Base: Place the core base on the center of the base plate. Double-check that it’s aligned.
Assemble the Upper Parts of the Fountain Core: Stack the remaining sections of the fountain core, one at a time. Align each piece carefully to maintain balance.
Install the Water Pipe: Thread the water pipe through the center of the fountain. This step is crucial for proper water flow.
Take your time with each step. Rushing can lead to mistakes, and trust me, disassembling a marble fountain to fix errors is no fun.
Securing each section properly
As you assemble the fountain, securing each section is critical. I use a rubber mallet to gently tap pieces into place. This ensures a snug fit without damaging the marble. For added stability, some fountains come with metal rods or adhesive. Follow the instructions to use these correctly. Once everything is in place, give the fountain a gentle shake to check for wobbling. If it feels unstable, adjust the alignment before moving on.
Adding Decorative Features
Installing statues or spouts
Now for the fun part—adding decorative features! Many marble fountains include statues, spouts, or other embellishments. These elements not only enhance the fountain’s beauty but also create a unique focal point. Carefully position each feature according to the design. For example, if your fountain has a pedestal, place the statue on top to elevate its visibility. If there are spouts, connect them to the water pipe securely to ensure smooth water flow.
Pro Tip: The interplay of light and shadow on intricate carvings can make your fountain truly mesmerizing. Consider how sunlight hits the area when positioning these features.
Ensuring proper alignment
Proper alignment is key to achieving a polished look. I always step back and view the fountain from different angles to ensure everything lines up perfectly. If something looks off, adjust it before securing it permanently. This attention to detail makes a big difference in the final result. A well-aligned fountain not only looks stunning but also functions more efficiently.
Plumbing and Electrical Setup
Connecting the Water Supply
Installing the pump and tubing
Let’s start with the pump and tubing. These are the heart of your fountain’s water system. First, I position the pump at the base of the fountain, ensuring it’s stable and secure. Most pumps come with suction cups or brackets to hold them in place. If yours doesn’t, you can use a small brick or heavy object to anchor it.
Next, I attach the tubing to the pump. This step is pretty straightforward. Slide the tubing over the pump’s outlet and tighten it with a hose clamp. If the tubing feels stiff, soaking it in warm water for a few minutes can make it more flexible. Once connected, I thread the tubing through the fountain’s central column, making sure it reaches the top spout.
Tip: Double-check the tubing length before cutting it. It’s better to have extra tubing than to come up short.
Ensuring watertight connections
Watertight connections are crucial for a leak-free fountain. I always inspect the tubing and pump connections closely. If I spot any gaps or loose fittings, I seal them with waterproof tape or silicone sealant. For added security, I test the connections by running a small amount of water through the system. If there’s no leakage, I know the setup is solid.
Callout: A watertight system not only prevents leaks but also keeps the pump running efficiently. It’s worth taking the time to get this right.
Setting Up Electrical Components
Installing a GFCI outlet
Safety comes first when dealing with electricity. If you don’t already have a GFCI outlet near your fountain, you’ll need to install one. These outlets protect against electrical shocks, especially in outdoor settings. I usually hire a licensed electrician for this step to ensure it’s done correctly.
Once the outlet is installed, I check its location. It should be close enough to the fountain for the pump’s power cord to reach but far enough to avoid water splashes. If the cord is too short, I use a weatherproof extension cord designed for outdoor use.
Pro Tip: Look for GFCI outlets with built-in covers. They keep the outlet safe from rain and debris.
Connecting the pump to power
With the outlet ready, I plug in the pump. Before doing this, I make sure the pump’s cord is dry and free of damage. Once connected, I switch on the pump to test its operation. If the pump doesn’t start, I check the outlet and cord for issues.
Note: Avoid running the pump dry. Always fill the fountain with water before powering it on to prevent damage.
Testing for Functionality
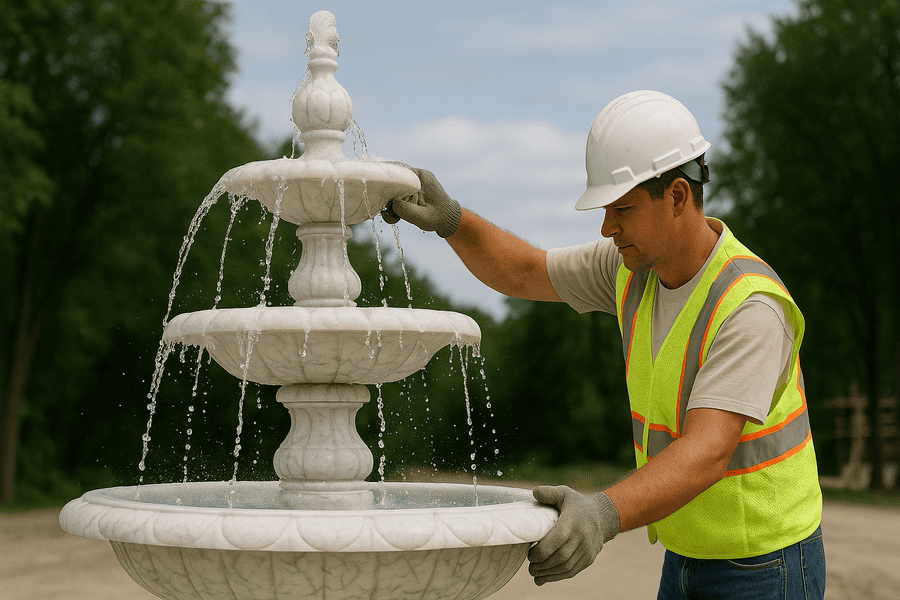
Running water through the system
Now comes the exciting part—testing the fountain! I fill the basin with water, ensuring it covers the pump completely. Then, I turn on the pump and watch as water flows through the tubing and out of the spouts. If the water isn’t flowing smoothly, I check for kinks in the tubing or blockages in the spouts.
Alert: If you hear unusual noises from the pump, it might be struggling to draw water. Turn it off immediately and troubleshoot the issue.
Adjusting settings for optimal flow
Once the water is flowing, I adjust the pump’s settings to achieve the desired flow rate. Most pumps have a dial or lever for this. I prefer a gentle flow for a calming effect, but you can increase the rate for a more dramatic display.
Finally, I step back and admire the fountain in action. Watching the water cascade over the marble is incredibly satisfying. It’s the moment when all the hard work pays off.
Callout: Take your time with adjustments. A well-balanced flow enhances both the beauty and functionality of your fountai
Testing and Adjustments
Running the Fountain
Checking for smooth operation
Once the fountain is set up, it’s time to see it in action! I always start by filling the basin with clean water, ensuring the pump is fully submerged. Then, I switch on the pump and watch as the water begins to flow. This is the moment when all the hard work starts to pay off.
While the fountain runs, I keep an eye on the water flow. Is it smooth and consistent? If the water sputters or sprays unevenly, it might indicate a blockage or air trapped in the tubing. I also listen carefully. A quiet hum from the pump is normal, but loud noises or rattling could mean something’s off.
Tip: If the pump sounds noisy, try repositioning it or checking for debris. Sometimes, a simple adjustment can make a big difference.
Identifying and fixing issues
If something doesn’t seem right, don’t panic. Troubleshooting is part of the process. For uneven water flow, I check the tubing for kinks or bends. Straightening it out usually solves the problem. If the water isn’t reaching the top spout, the pump might not be powerful enough. In that case, upgrading to a stronger pump can help.
Leaks are another common issue. If I notice water pooling around the base, I inspect the connections and seals. A quick application of waterproof sealant often does the trick.
Callout: Take your time during this step. Identifying and fixing small issues now will save you from bigger headaches later.
Stabilizing the Fountain
Ensuring the fountain is level
A level fountain isn’t just about looks—it’s essential for proper function. I use a spirit level to check the fountain from all sides. If it’s slightly tilted, water might flow unevenly or spill over the edges. To fix this, I adjust the base by adding or removing small amounts of sand or gravel beneath it.
Pro Tip: Check the level again after every adjustment. It’s better to make small changes than to overcorrect and create new problems.
Adjusting components for stability
Once the fountain is level, I focus on stability. I gently push and pull on each section to ensure everything is secure. If a piece feels loose, I tighten it using the tools provided in the assembly kit. For added stability, some fountains allow you to use adhesive or metal rods to lock the sections in place.
Finally, I step back and admire the fountain. It should feel solid and look perfectly aligned. A stable fountain not only lasts longer but also gives you peace of mind.
Alert: Never skip this step. An unstable fountain can become a safety hazard, especially in windy conditions.
Landscaping and Enhancements
Integrating the Fountain into Your Garden
Adding plants or mulch around the base
Once the fountain is up and running, it’s time to make it shine in your garden. I always start by adding plants or mulch around the base. This step softens the edges and blends the fountain into the surrounding landscape. For plants, I recommend low-maintenance options like ferns, hostas, or ornamental grasses. These thrive in the moist environment near the fountain and add a lush, green touch.
Mulch is another great option. It keeps the area tidy and prevents weeds from popping up. I usually go for bark mulch or decorative stones. Both look fantastic and help with drainage. Spread the mulch evenly around the base, leaving a small gap near the fountain to avoid moisture buildup.
Tip: Choose plants with varying heights and textures. This creates depth and makes the fountain the focal point of your garden.
Creating a cohesive design
A cohesive design ties everything together. I like to think about the overall theme of the garden. Is it modern, rustic, or tropical? Use this as a guide when selecting plants, mulch, and other elements. For a modern look, stick to clean lines and monochromatic colors. For a rustic vibe, add wildflowers and natural stones.
Grouping plants in clusters works wonders. It creates visual interest and makes the fountain feel like part of the garden rather than an isolated feature. I also recommend adding a pathway leading to the fountain. It invites people to explore and enjoy the space.
Callout: A well-designed garden doesn’t just look good—it feels inviting. Take your time to plan and experiment with different layouts.
Lighting and Decorative Additions
Installing LED lights
Lighting transforms a fountain at night. I love using LED lights because they’re energy-efficient and come in a variety of colors. Submersible lights are perfect for highlighting the water flow, while spotlights can illuminate the fountain’s structure.
When installing lights, I position them strategically. For example, I place submersible lights near the spouts to make the water sparkle. Spotlights go at ground level, angled upward to emphasize the marble’s texture. If you’re using solar-powered lights, make sure they get enough sunlight during the day.
Pro Tip: Warm white lights create a cozy atmosphere, while colored lights add a playful touch. Experiment to see what works best for your space.
Adding decorative elements
Decorative elements bring personality to your fountain. I often add small statues, garden ornaments, or even a few colorful stones around the base. These details make the fountain unique and reflect your style.
For a whimsical look, try adding fairy figurines or miniature bridges. If you prefer elegance, marble or bronze statues work beautifully. Just make sure the decorations complement the fountain rather than overpower it.
Alert: Avoid overcrowding the area. Too many decorations can distract from the fountain’s beauty. Keep it simple and balanced.
Maintenance and Care
Regular Cleaning
Removing debris and algae
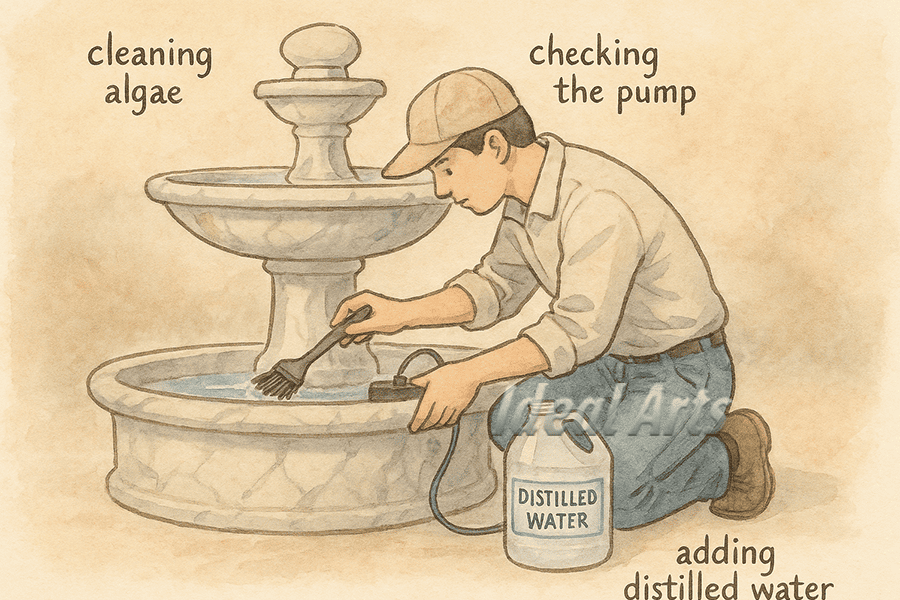
Keeping your marble fountain clean is essential for its beauty and functionality. I always start by removing debris like leaves, twigs, or dirt from the basin. A simple net or skimmer works wonders for this. Algae can be a bit trickier, but don’t worry—it’s manageable. I use a soft-bristled brush to scrub the marble gently. Harsh tools can scratch the surface, so avoid anything abrasive.
For stubborn algae, I mix white vinegar with water. It’s eco-friendly and effective. Just apply the solution to the affected areas and let it sit for a few minutes before scrubbing. Regular cleaning prevents buildup and keeps the fountain looking pristine.
Tip: Place your fountain in a shaded area to reduce algae growth. Covers can also help minimize debris accumulation when the fountain isn’t in use.
Cleaning the pump and tubing
The pump is the heart of your fountain, so it needs extra care. I clean mine every few weeks to keep the water flowing smoothly. First, I unplug the pump and remove it from the fountain. Then, I rinse it under running water to clear out dirt and debris. For clogs, I use a small brush to clean the intake valve and impeller.
Tubing can also collect grime over time. I detach it and flush it with warm water. If the tubing is particularly dirty, soaking it in a mild biodegradable detergent helps. Keeping the pump and tubing clean ensures your fountain runs efficiently and lasts longer.
Callout: A clean pump not only improves water flow but also reduces noise, making your fountain even more relaxing.
Winterizing the Fountain
Draining water before freezing temperatures
Winter can be tough on fountains, especially marble ones. Freezing temperatures can cause cracks if water is left inside. Before the first frost, I drain all the water from the basin and tubing. A small bucket or siphon hose makes this task easy.
Once the fountain is dry, I wipe down the surfaces to remove any lingering moisture. This step prevents ice from forming and damaging the marble. Trust me, taking the time to do this now saves you from costly repairs later.
Covering the fountain for protection
After draining the water, I cover the fountain to shield it from snow, ice, and debris. I use a waterproof, breathable cover that fits snugly over the structure. Avoid plastic tarps—they trap moisture and can cause mold.
If your fountain has delicate decorative features, consider wrapping them in padding before covering the entire fountain. This adds an extra layer of protection. When spring arrives, your fountain will be ready to shine again.
Pro Tip: Store smaller components like the pump indoors during winter. This keeps them safe and extends their lifespan.
Troubleshooting Common Issues
Fixing low water flow or pump noise
Low water flow can ruin the fountain’s charm, but fixing it is simple. I start by checking the pump. If it’s clogged, I clean the intake valve and tubing as described earlier. Sometimes, the issue is a kink in the tubing. Straightening it out usually restores the flow.
Pump noise is another common problem. If the pump sounds loud or rattles, it might not be fully submerged. Adding more water to the basin often solves this. If the noise persists, I inspect the pump for debris or damage. Regular maintenance keeps these issues at bay.
Alert: Never run the pump dry. It can overheat and break, leading to costly replacements.
Repairing leaks or cracks
Leaks can be frustrating, but they’re fixable. I always start by identifying the source. If the basin is leaking, I apply a waterproof sealant to the affected area. For cracks in the marble, I use a specialized marble repair kit. These kits include epoxy that matches the marble’s color, making repairs almost invisible.
After sealing the cracks, I let the fountain sit for 24 hours to ensure the epoxy cures properly. Regular inspections help catch small issues before they become major problems.
Callout: Address leaks and cracks promptly to prevent further damage and keep your fountain looking flawless.
Installing a marble fountain might seem like a big project, but breaking it into manageable steps makes it achievable. Here’s a quick recap to guide you:
Pick a level, sturdy spot and clear it of debris.
Gather tools like a shovel, measuring tape, and safety goggles.
Build a solid foundation with gravel and concrete.
Assemble the fountain in sections, ensuring stability and alignment.
Connect the water supply and test the flow.
Add landscaping to enhance its beauty.
Clean and inspect it regularly to keep it in top shape.
Once it’s set up, take a moment to enjoy the soothing sound of water and the elegance it brings to your space. Regular maintenance ensures your fountain stays stunning for years. Trust me, the effort is worth it!
FAQ
What size marble fountain should I choose for my space?
The size depends on your available space. For small gardens, a compact fountain works best. Larger courtyards can handle grander designs. Always leave enough room for walking and landscaping around the fountain.
How much water does a marble fountain use?
Most fountains recirculate water, so they don’t use much. You’ll only need to top it off occasionally to replace water lost to evaporation. A small fountain might need a gallon or two weekly.
Can I install a marble fountain by myself?
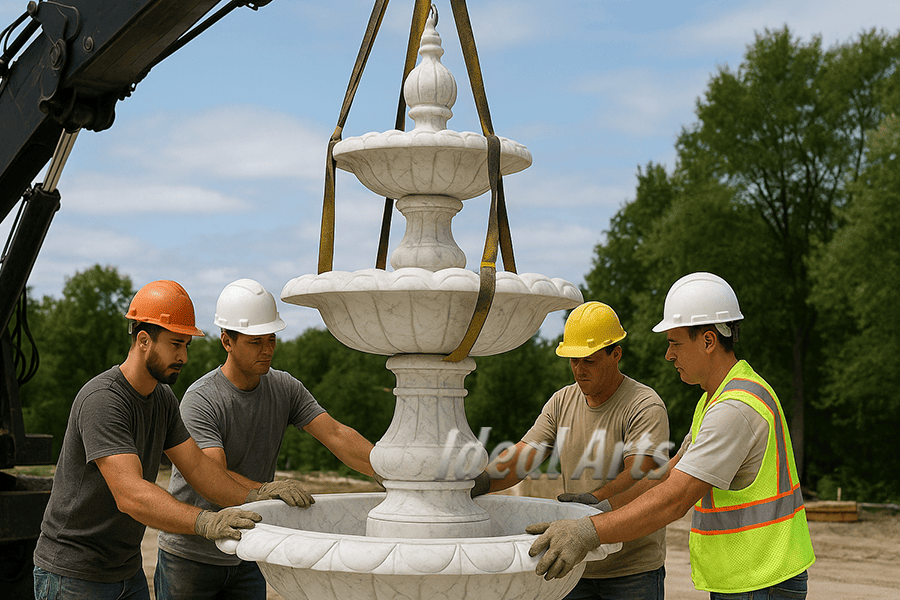
Yes, you can! With proper tools, patience, and this guide, it’s totally doable. For larger fountains, you might need an extra pair of hands or professional help for heavy lifting.
Tip: Start with a smaller fountain if it’s your first installation.
How do I prevent algae growth in my fountain?
Place the fountain in partial shade and clean it regularly. Adding a small amount of fountain-safe algaecide can also help. Avoid overusing chemicals to protect the marble.
Do marble fountains require a lot of maintenance?
Not really. Regular cleaning, checking the pump, and seasonal care like winterizing are the main tasks. With consistent upkeep, your fountain will stay beautiful and functional for years.
Can I leave my fountain running all the time?
Yes, running it continuously is fine. It keeps the water fresh and prevents the pump from clogging. Just make sure the basin stays full to avoid running the pump dry.
What should I do if my fountain develops a crack?
Small cracks can be repaired with a marble repair kit. For larger damage, consult a professional. Regular inspections help catch issues early before they worsen.
Alert: Don’t ignore cracks—they can lead to leaks or structural problems.
Is a marble fountain safe for homes with kids or pets?
Yes, but take precautions. Ensure the fountain is stable and supervise children or pets around it. Adding a shallow basin or fencing can enhance safety.
Callout: A well-secured fountain ensures peace of mind for families.
The Statue of Liberty stands in New York Harbor. It is a gift from France to the United States, symbolizing freedom and democracy. It is 46 meters high, holding a torch in her right hand and the Declaration of Independence in her left hand. The pedestal is engraved with the poem “Welcome all who yearn to breathe free.” Since its completion in 1886, it has always been an iconic symbol of the spirit of freedom around the world.
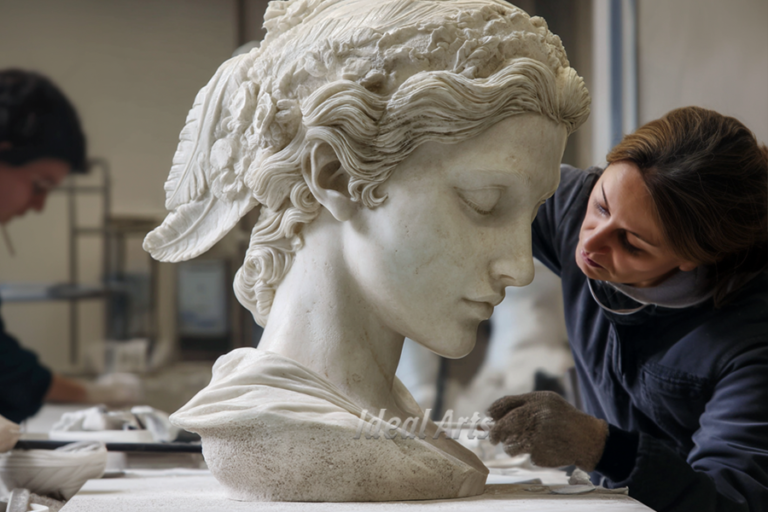
Customized sculptures without confusion: choose the right sculptor, clarify the design idea, control the budget and materials. This is not a simple purchase, but a co-creation of art — turning your unique inspiration into an eternal legend in stone.
The Pietà, a famous sculpture of Mary holding the lifeless Jesus, symbolizes love, sacrifice, and faith. Michelangelo’s masterpiece captures deep sorrow and divine grace, making it a significant religious and artistic icon that continues to inspire millions worldwide.
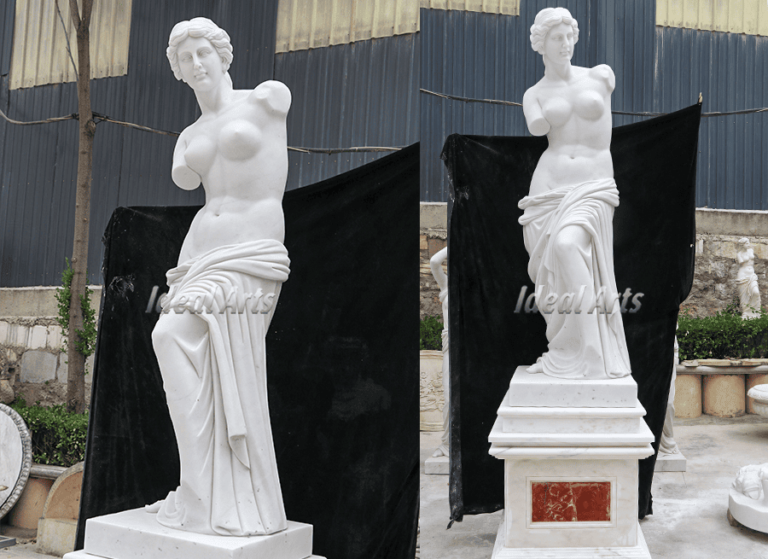
Aphrodite’s symbols, like the dove and rose, represent love and beauty. The Venus de Milo, her most famous statue, remains iconic despite its missing arms. Her influence continues to shape art and culture, proving that beauty and mystery are timeless.
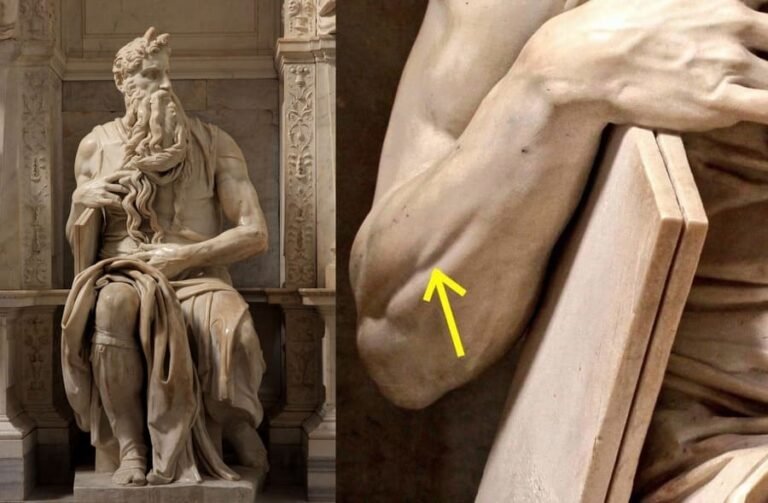
Greek sculptures are muscular because the Greeks admired athletic, strong, and smart bodies. They wanted to inspire everyone to be like them. The Greeks loved exercising and playing sports. They believed that being physically fit was really important for being happy and healthy.
Ask Us Anything. anytime.
Our team is ready to provide expert sculpture customization advice and answer all your questions. Whether you need help with product details, placing an order, or anything else, we are here for you 24/7. Don’t hesitate to contact us – just leave a message!
Get eCatalog
Want to see the beauty of our sculptures? Get our catalog today and see the possibilities!
 Skip to content